Latest Posts

Blueberry, Lemon and Buttermilk Cake

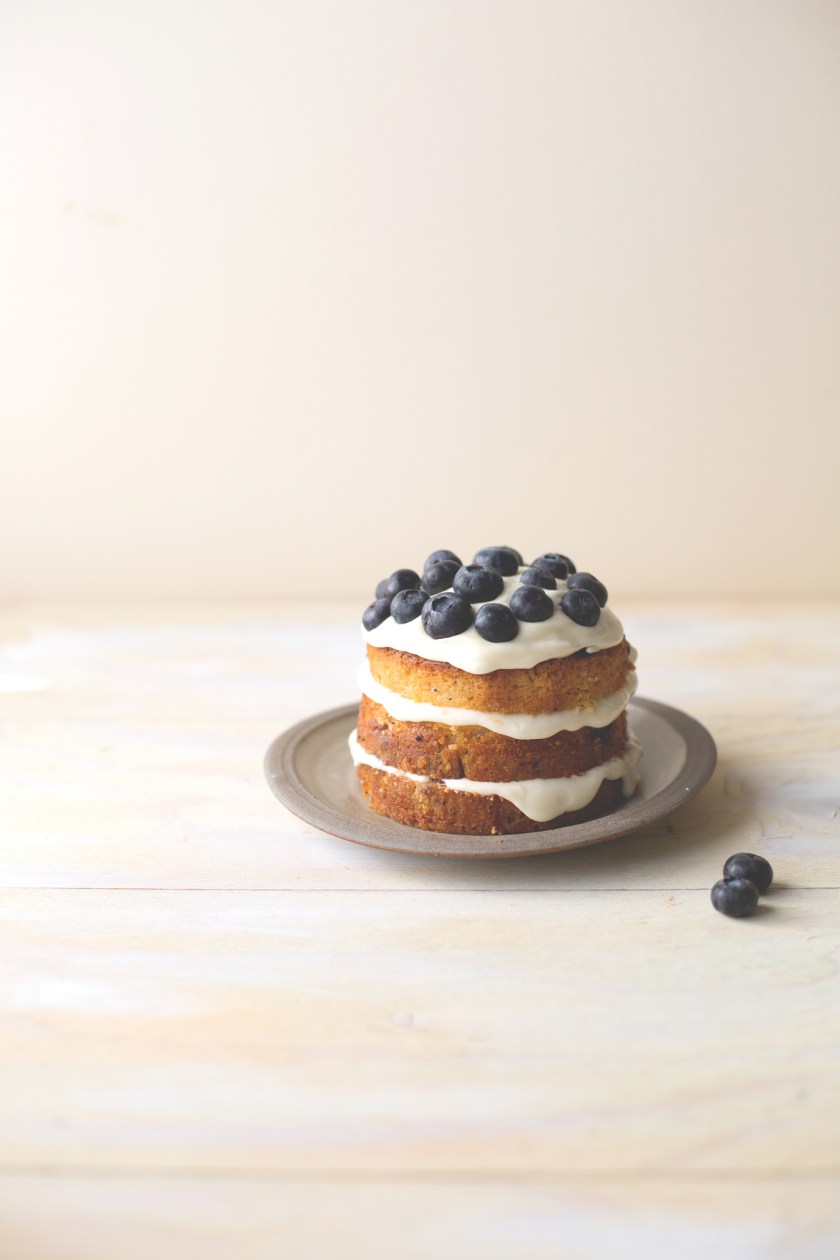
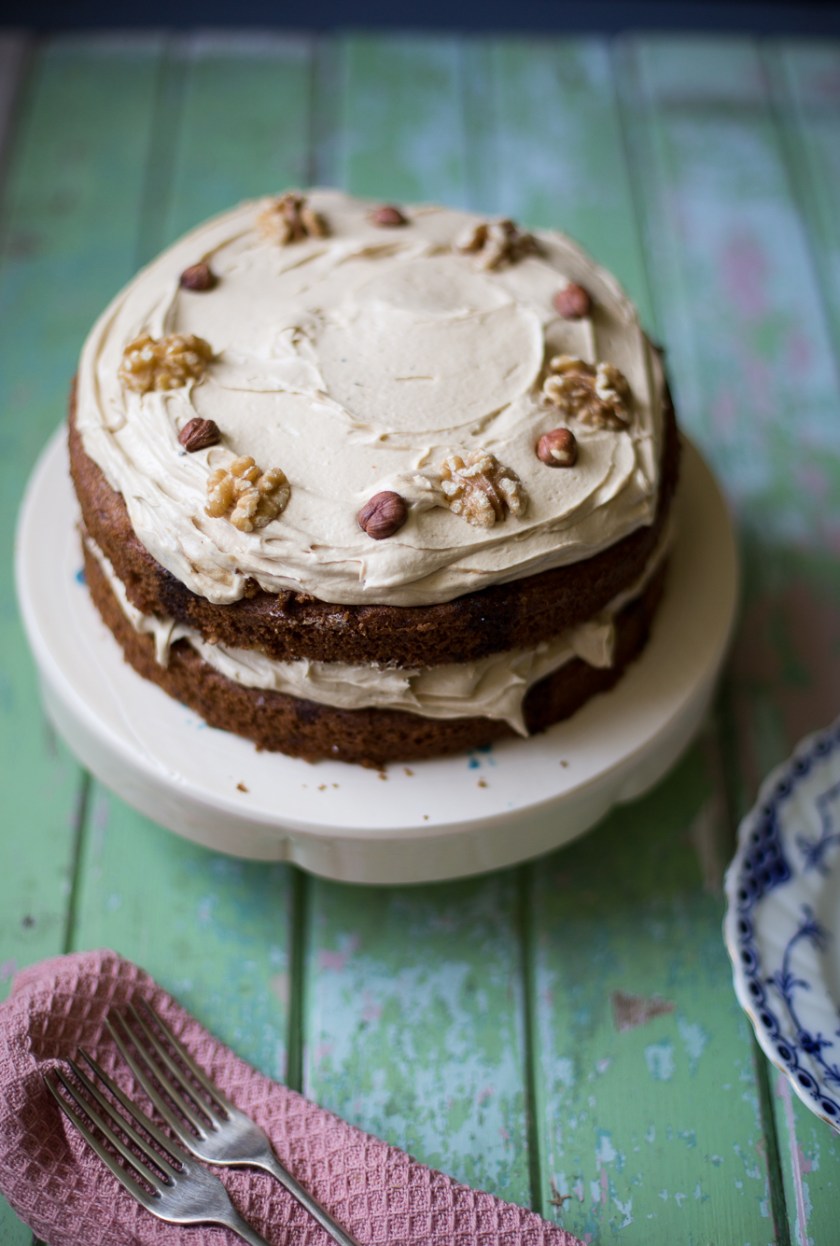
Ever since my mum brought back a small vintage cake tin, from Canada, I’ve been on the lookout for a recipe to test it out on. It’s probably the top tier from a wedding cake pan set, somehow separated from the rest, but as it turns out, is the perfect size for two or three people. There is something so pleasing about making small individual cakes, like this one. And very manageable too. But it did make me think of a book Delia Smith wrote back in the 80’s called One is Fun!

But seriously, if you like baking, and don’t need to feed a crowd, I can highly recommend getting a small tin like this one, and start making smaller cakes. (otherwise you just end up eating 8 pieces..)

I have been on a mission lately looking for lemon inspired recipes, for my very soon to be wedding. Lemons and all things Tuscan & Botanical seems to be my theme for the wedding, so as the desert option, I have roped in all my good baker friends to make and bake lemon cakes of all varieties.

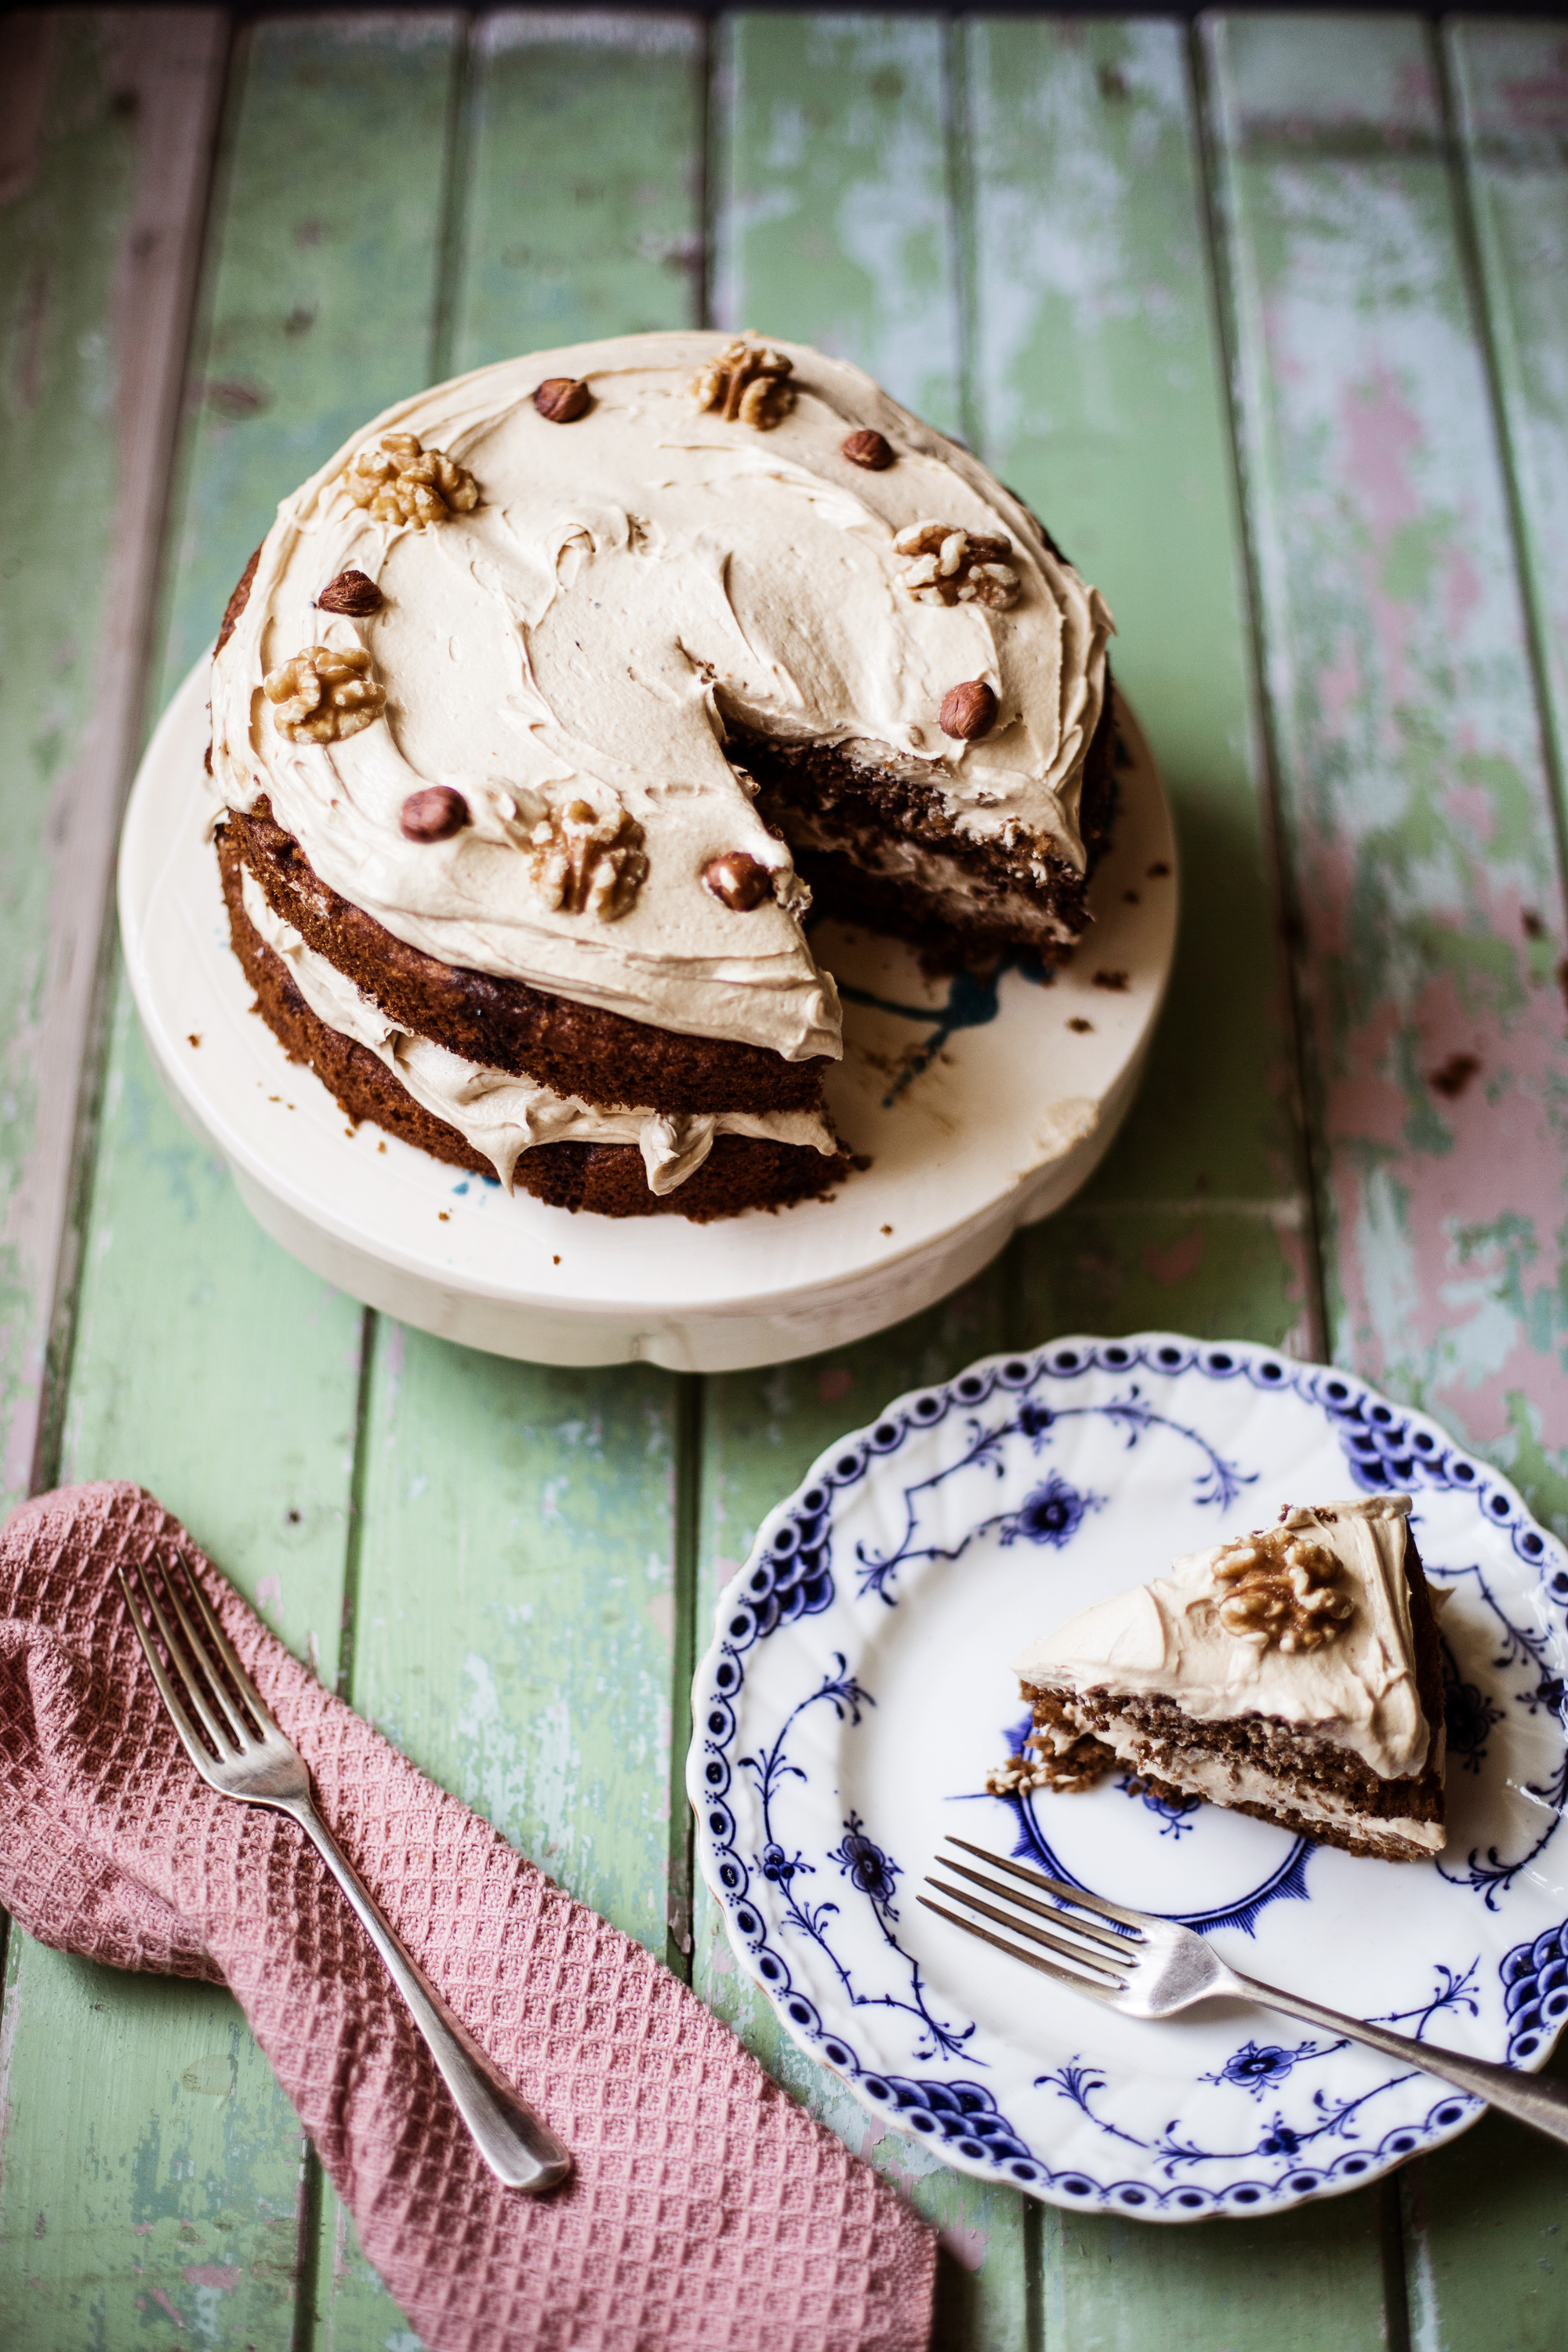
I have adapted this recipe from Sally’s Baking Addiction, down to fit my small 10 cm tin. And I added poppy seeds for a bit of texture. I knew it would be fantastic when I saw she used buttermilk – a firm favourite in Scandinavian cooking, and so made me feel at home. But if you are after making a big cake to feed 8, just scroll to the bottom for the measurements for that.

blueberry cake (1 of 8)

blueberry cake, camera and Clementine

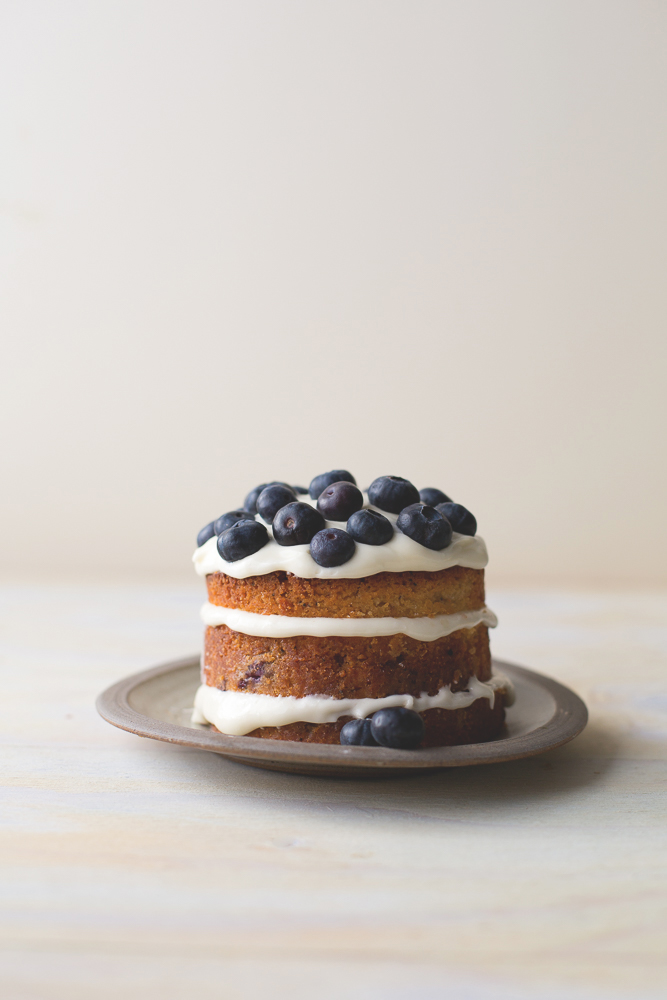
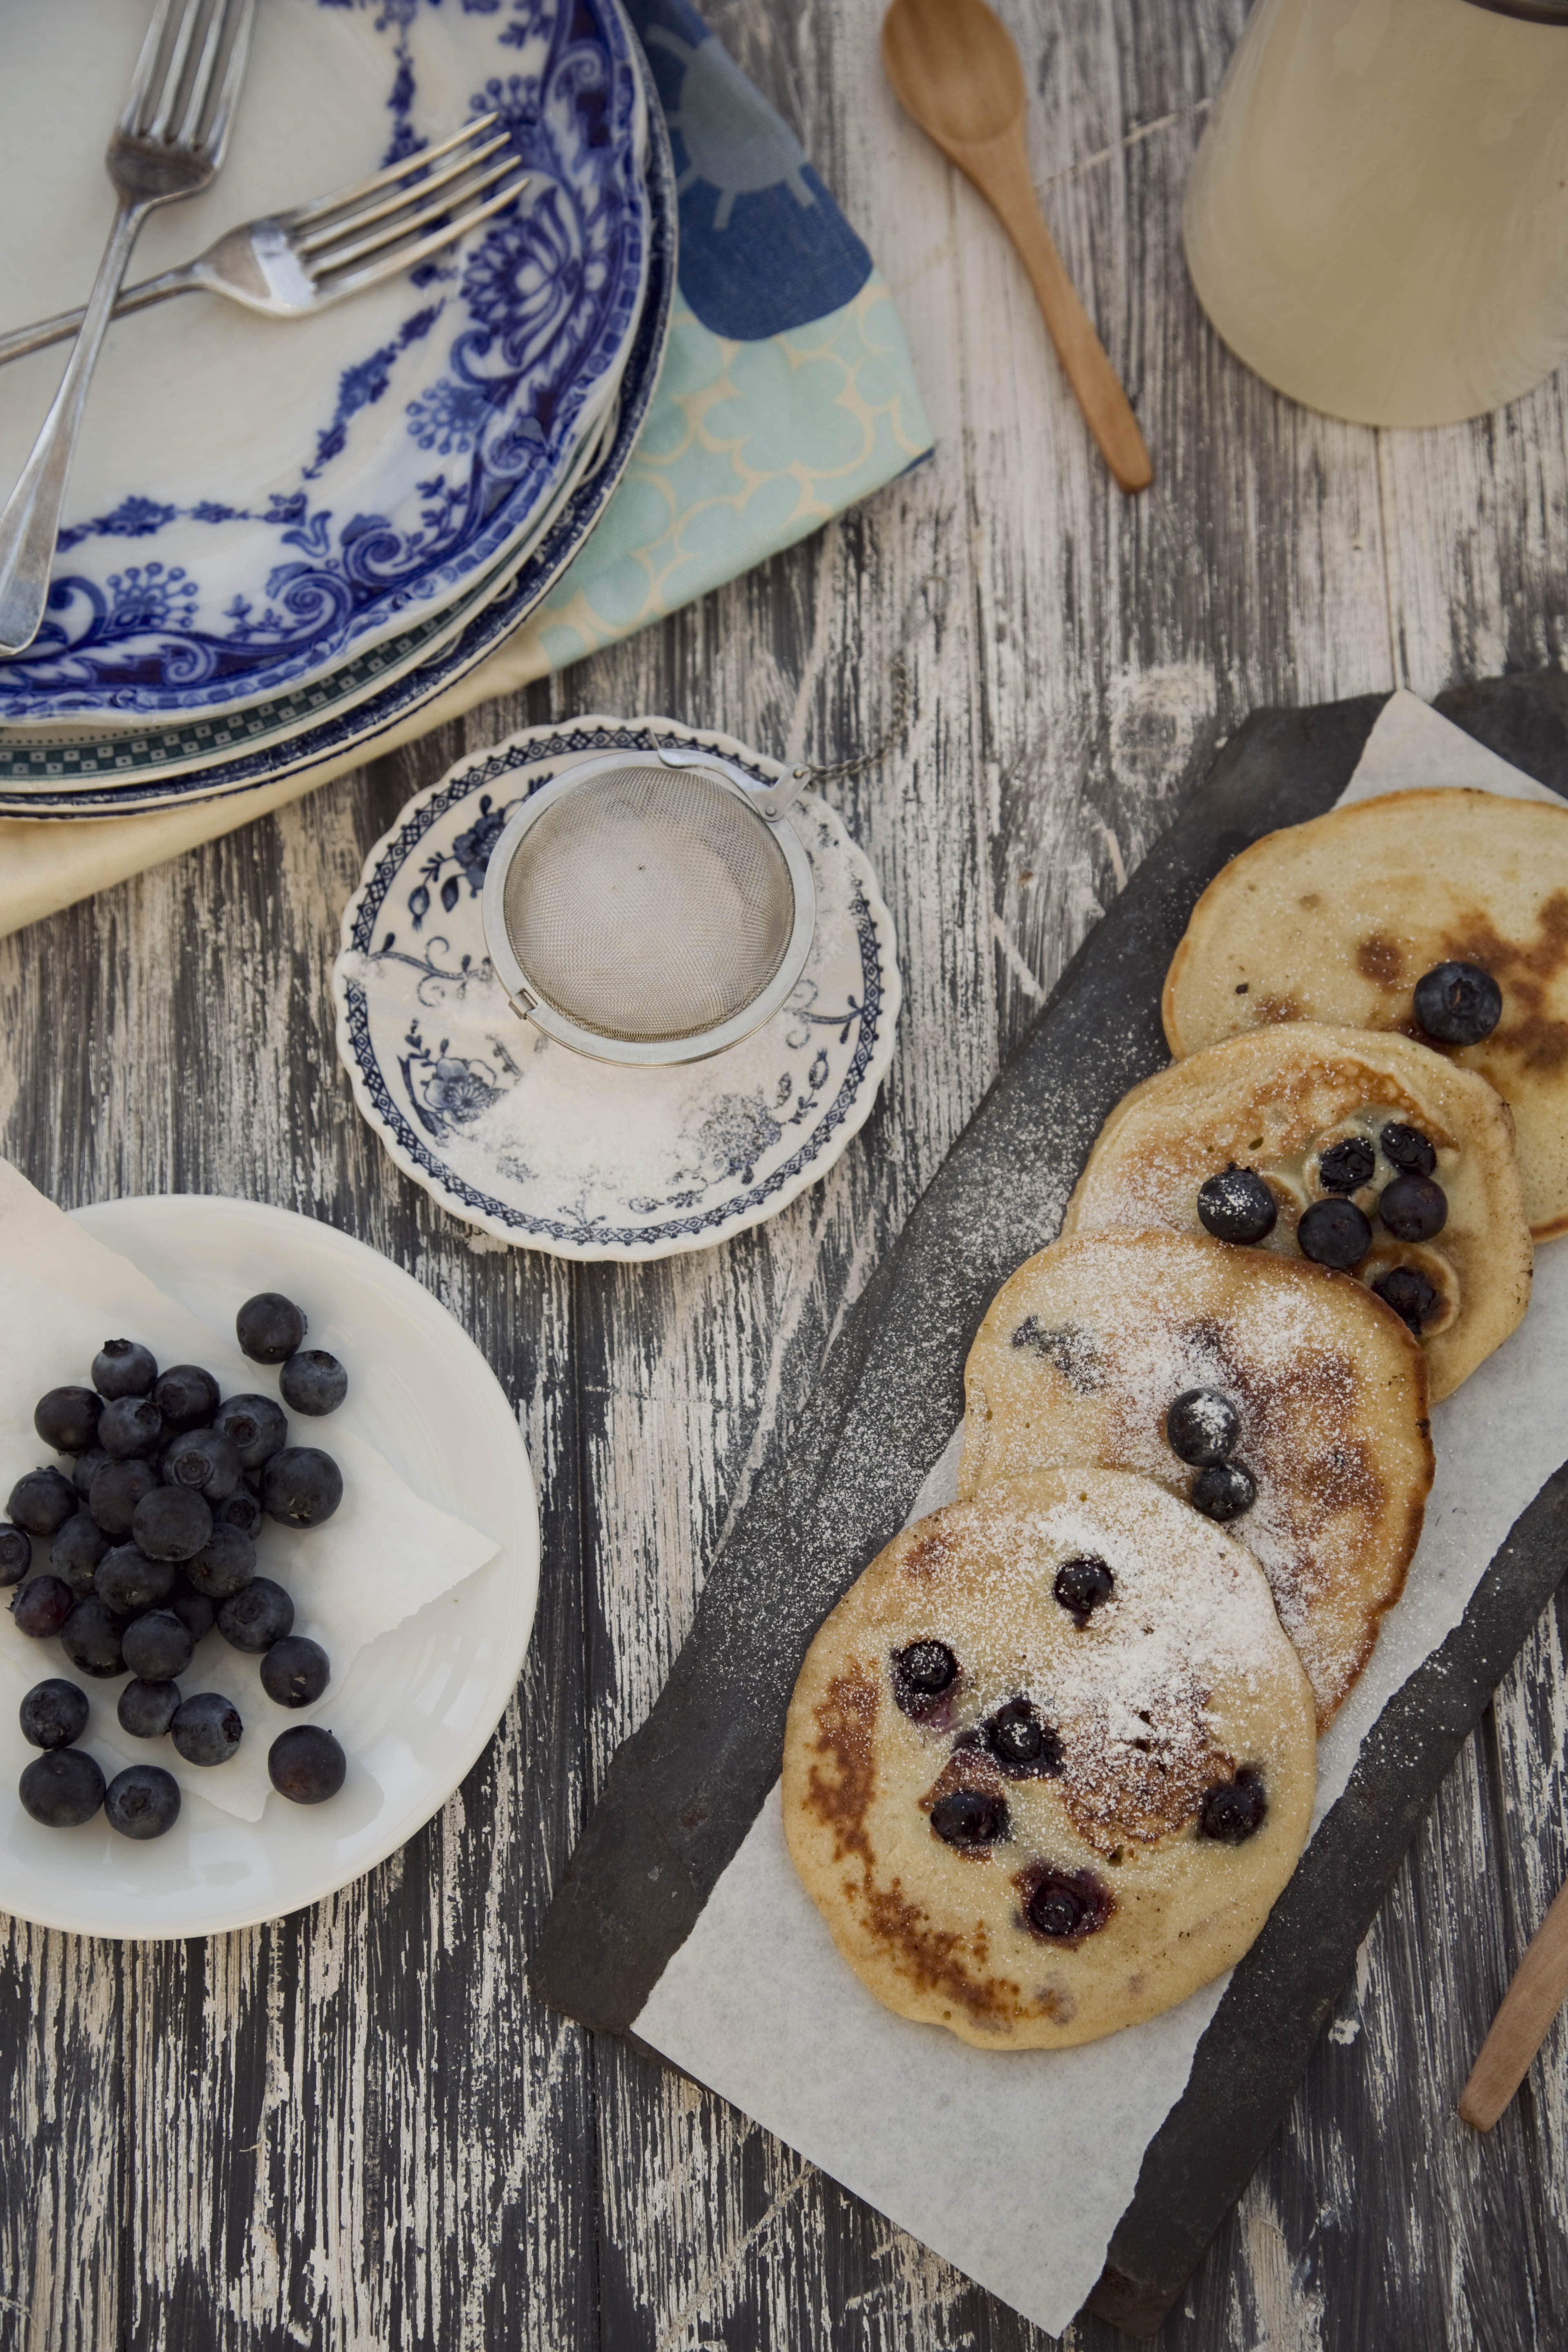
oh and a side note – the two beautiful plates I’ve used have a funny story, as they’re not mine, but belong to my bridesmaid Annie, whose husband never lets me leave their house without taking something out of their crockery cupboard. I absolutely love this ritual we have developed, but I do fear that Annie’s patience will start to wear thin, as her stack of plates slowly dwindle….

however the Royal Copenhagen plate is proudly mine!


Mini Blueberry, Lemon & Buttermilk Cake

Ingredients

75g butter
175g granulated sugar
1 organic egg
100g plain flour
1/2 tsp baking powder
1/3 vanilla pod, seeds scraped out
80ml buttermilk
1 lemon, juice and zest of
1 tbsp poppy seeds

Cream Cheese Icing

80g cream cheese
40g butter
140g icing sugar
1/2 lemon, zest of


blueberry cake (6 of 8)


Preheat oven to 160/Fan 150/Gas 3

Grease and line your 10 cm tin, set aside.

Cream the butter, vanilla seeds and sugar together, by hand or with a mixer, until light and fluffy.

Next add the eggs, one at a time + 1 tbsp of the flour, beating well after each addition.

Now add the buttermilk, and fold in.

Add the rest of the flour, together with the baking powder and lemon zest, mix well.

Then add the poppy seeds and lemon juice.

Finally incorporate the blueberries, by gently folding them in.

Spoon the cake mixture into your lined tin, and bake in the centre of your oven for 35-40 minutes, or until a skewer inserted comes out clean.

Leave to cool in the tin, on a wire rack.

To assemble & decorate the cake

Once cooled, remove the cake from the tin, and slice in 3, using a long bread knife. Set aside.

Make the icing with an electric hand mixer, or in your food processor with a paddle attachment.

Beat the butter,  sugar and zest together until fluffy. Then spoon in the cream cheese, and fold in until fully incorporated. If you live somewhere hot, pop it in the fridge to re-set for 20 minutes.

When you are ready to ice the cake, place the bottom layer on a plate, and spread a generous layer of frosting on it. Place the second layer on top and do the same. Spread the remaining cream cheese frosting on the surface, and decorate with extra fresh blueberries.

blueberry cake (7 of 8)


blueberry cake (8 of 8)


Ingredients for a large cake

Follow the above directions, but divide the mixture between 3 greased and lined 22 cm tins, and bake for 20-25 minutes.

230g butter, softened to room temperature
350g granulated sugar
4 organic eggs
1 vanilla pod, seeds scraped out
375g plain flour
1 1/2  tsp baking powder
240ml buttermilk
2 lemons, juice and zest of
2 tbsp poppy seeds
200g blueberries, plus extra for decorating

Cream Cheese Frosting

250g full-fat cream cheese
100g unsalted butter, softened to room temperature
450g icing sugar
1/2 lemon, zest of


blueberry cake (5 of 8)

apricot sorbet, Camera and Clementine

Roasted Apricot, Peach and Vodka Sorbet

Yes its still winter, and its blowing a gale. But that doesn’t mean desert is of the menu.
If you are lucky enough to have an apricot tree in your garden, save this recipe for the summer. Or if you are lucky enough to live in Australia (!) then now is the season for these fabulous little stone fruits. Or so I’m told by Sam at Nourish Food Life, who is living the dream – in an orchard no less!

roast apricots

This is a delicious and refreshing Peach, Apricot and Vodka Sorbet that a put together last summer for a magazine recipe. I made it sugar free, and sweetened it with the help of honey and agave syrup. I also made it for ‘adults only’ by adding a dash of vodka to the sorbet mixture. This gives its a smoother more luxurious texture, as the ice crystals don’t freeze too hard.

roast apricots copy small

I also roasted the apricots first, before simmering them in the honey, to get them really soft and bursting with nectar-like aromas.

____________________________________________
Serves 6

12 or 500g apricots
1 can of unsweetened peaches or 3 fresh peaches
60 ml honey
60 ml organic agave syrup
100 ml peach juice
1 tbsp vodka (can be omitted)
a squeeze of lemon juice

____________________________________

Preheat oven to 160C/130 fan/gas mark 2

Halve, and de-stone the apricots and place in a roasting dish lined with grease proof paper. Roast in the oven for 25 min. Then set aside.

Meanwhile prepare your peaches. If using fresh peaches, de-stone first.
Finely dice the peaches and set aside 1/4 of the fruit for later. Place the remaining fruit in a small saucepan, together with the honey and agave syrup.
Bring to a gentle simmer.
Now add the roasted apricots, and simmer for 4-5 min.
Take off the heat, and add the lemon juice and vodka (optional).
Place the fruit mixture in a blender and blitz until smooth.
Stir in the diced peach which was set aside earlier, then pour the sorbet mixture into an ice-cream maker and follow instructions.

Alternatively pour into a freezer container, and place in the freezer.
Every 30 min take the sorbet mixture out of the freezer and stir with a fork. This will ensure a smooth textured sorbet. Do this 3 times.

The sorbet will be ready after 2.5-3 hours.

Film Photography


Camera & Clementine has a new look.
More available content, more food, recipes and photography.

As well as featuring seasonal food and recipes as always, I will also be posting some more of my personal photography from time to time.

Hope you enjoy.

Anna x

Camera & Clementine

About Camera & Clementine

Camera & Clementine is a vegetarian* food blog, run by me Anna Pettigrew. It was founded on the principals of using healthy and seasonal produce in the kitchen. Most of which during the summer months I grow myself.

My love of beautiful food and cooking, combined with my skills as a photographer motivated me to start this blog in 2013, and it is my hope that it will inspire others to cook and eat seasonally as well as grow their own and forage for wild food.

I have roots both in Denmark and in Scotland where I currently live and work as a photographer and recipe writer for cooking and gardening magazines.

I have been lucky enough to have traveled extensively around the world and eaten some really weird as well as magically wonderful food along the way, something that I think is reflected in my ‘world’ cooking style.

I like to have fun with my photography, which results in my food photographs being a mix of colourful and rustic images. I shoot using a Canon D5 mark III with a range of Canon L series lenses.

3 small

2 small

Camera & Clementine er en vegetarisk mad blog baseret på princippet om at bruge sunde og sæsonbetonede råvarer i køkkenet. Varer som hovedsageligt er dyrket af mig selv eller er fra økologiske haver og markeder i lokalområdet.

Min kærlighed til smuk mad og madlavning, kombineret med mine evner som fotograf er den motiverende faktor for opstart af denne blog og det er mit håb, at den vil give inspiration til at lave mad på samme vis med årstidsbestemte råvarer.

Jeg har rødder i Danmark og såvel som i Skotland, hvor jeg i øjeblikket bor og arbejder som fotograf og opskriftsforfatter til mad og havemagasiner.

Jeg har været så heldig at have rejst verden tynd og i den anledning har spist noget virkelig mærkværdigt såvel som magisk og vidunderligt mad undervejs, hvilket jeg finder, kan afspejles i min gastronomi stil.

Jeg kan lide at være kreativ med min fotografering og resultatet heraf er en blanding af farverige og rustikke billeder af min mad og madlavning.

Jeg arbejder med en Canon D5 mark III med en række af Canons L-serie linser. Der udover bruger jeg Photoshop CS6 til at færdigøre mine billeder.

Hvis lysten til at bruge mine billeder eller tekst skulle opstå, så kontakt venligst mig vedrørende tilladelse og priser.

annapettigrew

All of the content and photography on this website is Anna Pettigrew’s (unless otherwise specified) and is subjected to copyright. If you would like to use

any of the photography/text, you should use the proper attribution and contact Anna to gain permission first. 

* with the occasional sea food dish thrown in!

<meta name=”p:domain_verify” content=”60b42f83405e7ae21d8476331861e352″/>

Twice Cooked Butternut Squash Pasta

kg november-2

I woke up to the sound of lovely bird song this morning, the sun was shining, and on closer inspection, the daffodil heads had come up from between their green shoots. How exciting, spring will come again! And after a long walk with the dog, I fancied a pasta dish I made for Kitchen Garden Magazine back in November.

For this deliciously heart-warming dish, use either pumpkin or butternut squash. They both work well, but sometimes pumpkin can be hard to find out with Halloween, unless you have a farm shop near by.

What makes this dish a little different is the pan-frying of the pasta. This merges and melts all the flavours into a mouthwatering lunch or dinner.

___________________________________________________________

Ingredients

Serves 4

1 medium butternut squash

1 large onion, peeled and diced

3 cloves garlic, minced

a dash of olive oil

1 small handful fresh sage leaves

500g pasta

50g pumpkin seeds

good quality hard cheese , grated for the top

salt and pepper to taste

______________________________________________________


Pre heat the oven to 200C/fan 190C/gas mark 7.

Peel and dice the butternut squash, discarding the seed pulp.

Add the squash to an oven proof dish, along side the onion, salt and pepper and a drizzle of olive oil. Roast in the oven for 30 minutes until soft.

Add the pasta to a pan of boiling water and cook until al dente. Drain and set aside.

Remove the baked squash from the oven, and lightly mash with a wooden spoon.

Heat about two tablespoons of olive oil in a large pan or wok, add the garlic, sage leaves, pumpkin seeds and squash mixture. Lightly fry for 2-3 minutes.

Next add the cooked pasta and fry for a further 5 minutes, until golden.

Serve with grated parmigiana cheese, and fresh black pepper.

Happy Birthday me..Happy Birthday Blog

kg november-1

It’s my birthday tomorrow, and this month also marks the 2nd birthday of the blog. Happy Birthday Camera & Clementine!8B0A4906

I guess birthdays are a good time to pause and reflect on the year just past. It certainly makes it easy that my birthday is in January, when so many others are contemplating new years resolutions.

A lot has happened over the last year, as it so often does. I am now not only working for one magazine, but two. Kitchen Garden and Amateur Gardening.

It’s a real dream come true, to have my photographs and recipes published in two national magazines every month. And receiving positive feedback is such a gift.

This is also a year where I feel I can really look back at my wedding photography with pride. I have been so blessed with beautiful wedding couples, who have gone to such effort with the beautiful details of their special day. It is a joy to photograph a gorgeous wedding, and part of my photography career I really love to do.

EmmaIain-136_zpsb5507d78Lyndsey Niall-282


I myself also got engaged last year, a big event worthy of a mention. I’ve spent the last many months pondering wedding décor, dresses, shoes, and very importantly the menu! It is actually quite the undertaking planning a wedding, and so far friends and family have gone very much out of their way to help with the upcoming event.

January is also a month where I seriously start daydreaming about far away places, hot places! Christmas is now well past, so the idea of summer can now really lighten up my imagination. And I never think of an exotic place, without dreaming of that country’s regional food delights, such as – Figs and Honey from my Portuguese trip from a few years ago.

8B0A3012 copy


or American Style Blueberry Pancakes inspired by our 5 week trip around California, Arizona and Nevada. blueberry pancakes top down


Or my go to Danish birthday cake (lagkage) to make for others.

lagkage2


Ah, but it is still January, and there is still snow on the ground. So I’d better share with you my recipe for  Coffee, Walnut & Hazelnut Cake.  This is one of my all time favourite cakes to make, and to eat. And I can’t make it without being reminded of harvesting fresh green walnuts last summer…..

green walnuts (2 of 1) green walnuts (1 of 1)


This, light and flavour packed sponge works perfectly every time, and tastes amazing. The first bite is truly like eating a bite of heaven. I highly recommend giving it a go.

walnut cake (1 of 2)

walnut cake (2 of 2)

___________________________________________________

Coffee Walnut and Hazelnut Cake

Serves 8


For the cake

175g butter

100g golden caster sugar

75g soft brown sugar

3 organic large eggs

175g self-raising flour, sifted

1.5 teaspoons baking powder

50g walnuts, roughly chopped

50g hazelnuts, roughly chopped

2 tbsp instant coffee mixed with 2 tbsp boiling water


For the syrup

1 tablespoon instant coffee

50g soft brown sugar

55ml boiling water

For the coffee icing

250g unsalted butter, at room temperature

2 tsp instant coffee, dissolved in a small amount of hot water

400g icing sugar, sifted

_______________________________________________________

Preheat the oven to 170 C/fan 160C/gas mark 5

Grease and line two 20cm cake tins.

In a large mixing bowl, cream the butter and sugar until the mixture is pale and smooth.

Add the eggs, one at a time, mixing in between each addition.

Now add the flour and baking powder and beat well.

Add the coffee and ground walnuts to the batter and lightly mix in. Do not overmix the batter.

Divide the mixture evenly between the tins and bake in the oven for about 25 minutes until a skewer inserted comes out clean.

Remove from the oven and let the cakes cool in their tins.

Meanwhile, make up the syrup by combining the coffee, sugar and hot water.

Once the cakes are cool, prick the sponges with a fork, pour over the syrup and leave it to soak.

To ice the cakes, remove the cakes from the tins, and sandwich the two layers together with half of the icing. Use the remaining icing to ice the top using a pallet knife.

Decorate with walnut halves and hazelnuts around the edge.

Kale Gnocchi in Herb and Anchovy Sauce

What is a weather bomb!?” I asked a few weeks ago, after hearing the term on the news. Well we sure did find out! We have had weather bomb after weather bomb for the past three weeks. A high altitude black doughnut shape emerges on the horizon, slowly eating the daylight as it moves across the landscape..Then bang, throws all kinds of weather at you – snow, sleet, hail, rain..and a few 100 mph winds too. I had a terrifying experience creeping out into my garden two days ago, to see 2 large panes of glass from my greenhouse had taken flight and landed 10 meters away! They had smashed into hundreds of shards that had penetrated deep into the frozen grass!

So, its time to just stay indoors and eat good food, and drink cheap wine until the weather bombs return to just being ‘bad weather’. And what better to that with, that a hearty portion of winter kale from the garden and morish gnocchi. This is one of my favourite food right now, hope you enjoy!

kg mag jan-1

Italian Kale

Kale Gnocchi in Herb and Anchovy Sauce

Serves 4

_____________________________________________

Ingredients

2 packets of gnocchi

1 tbsp of butter

1 tbsp of extra virgin olive oil

1 x 60g can of anchovies in olive oil

2 small shallots, finely sliced

50g button mushrooms, thinly sliced

2 big handfuls of kale leaves (curly or Italian)

90ml of organic veg stock

90g Parmigiano cheese, grated, plus more to serve

3 tbsp of crème fraîche

½ lemon. juice and zest off

a small bunch of parsley, chopped

Salt and freshly ground black pepper to taste

____________________________________________

In a large pan of boiling water, poach the gnocchi for 3-4 minutes until they float to the surface of the water, remove with a slotted spoon. Set aside.

Heat up a large frying pan over medium-high heat, then add the butter. Once the butter is golden brown, add the gnocchi and fry them until nicely browned on both sides. Transfer to a plate.

Trim the stems off the kale, and finely slice the leaves.

Add 1 tbsp of extra virgin olive oil in the frying pan along with the anchovy fillets, heat them through for a few minutes.

Next add the sliced shallots and mushrooms, season with lots of ground pepper, then cook for 5 minutes until the shallots have softened. Add the sliced kale leaves, and cook until wilted.

Add the stock, and cook for a further 5 minutes.

Stir the grated cheese and crème fraîche into the pan.

Finally, add the gnocchi and toss to combine. Cook over high heat for a few more minutes to reduce the sauce.

Serve immediately with extra parmigiano.

More green recipes:

Super Green Smoothy

spinach smoothie

Homemade Organic Tomato Ketchup

ketchup-3_1
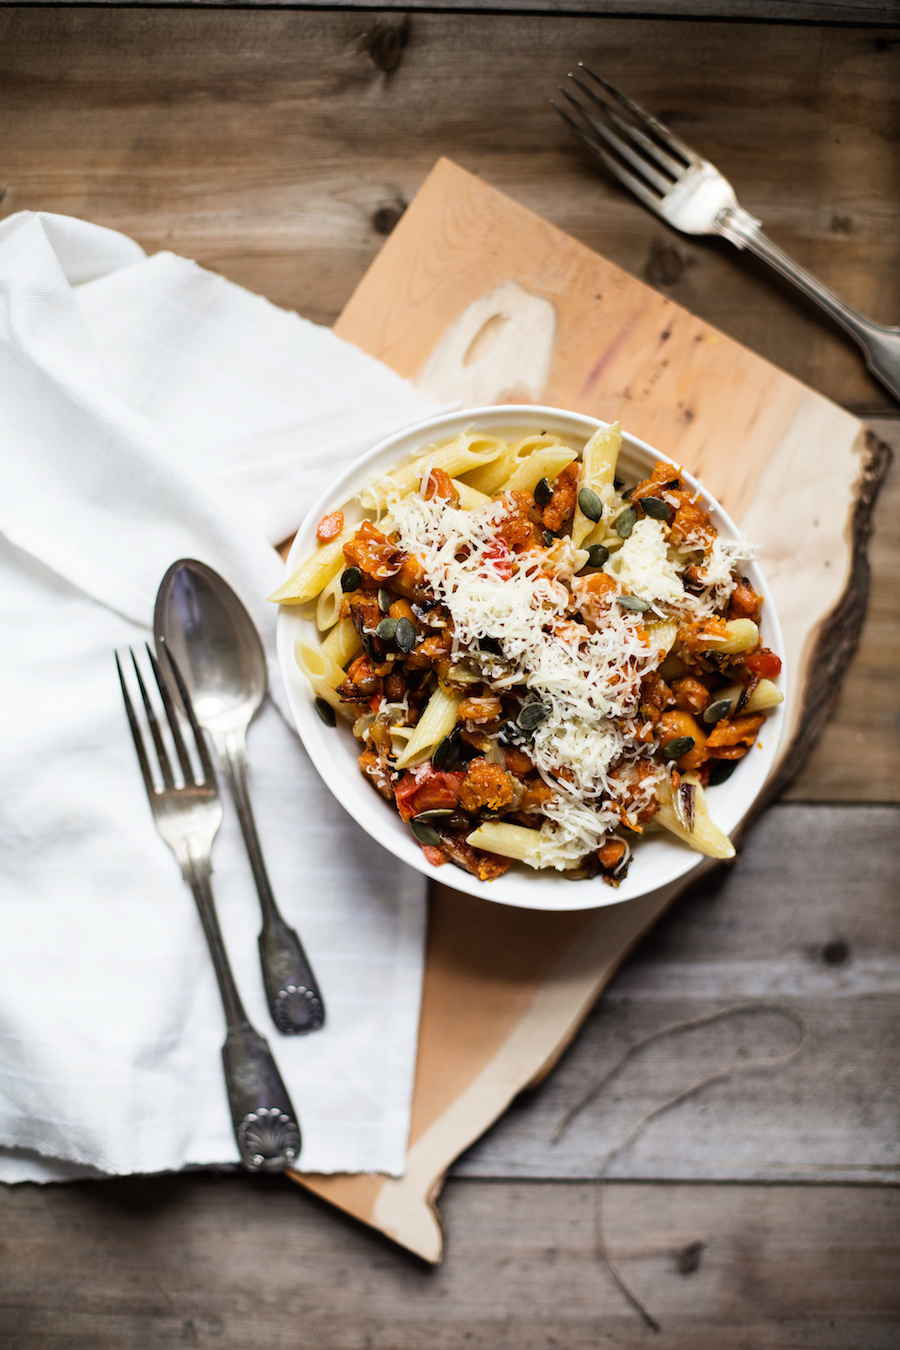
This summer has produced a fabulous amount of tomatoes in my greenhouse. We have been eating fresh organic tomatoes in our salads all summer long. But about 3 weeks ago, I just couldn’t keep up with the bumper crop, so I took to slow roasting my tom’s at 50 degrees for 2 hours in the oven with garlic and olive oil, and then freezing them for sauce later on in the year. We ate tomato pasta…tomato tarts..and finally I also made two large batches of tomato ketchup, one yellow and a classic red. And they are amazing!

victoria may harrison

This homemade tomato ketchup recipe is sweet, tangy and very aromatic. Adding star anise, cloves and fennel seeds makes this ketchup sit in a league of its own. Since making this delicious condiment, I’ve been looking for excuses to make all kinds of breakfast eggs, just so we can have more of this wonder sauce! And of course you can add it to veggie burgers, hot dogs and other things too. But it is best served over eggs, with hot coffee, homemade bread and two of your best friends.

ketchup-1_1 ketchup-2_1

______________________________________________________________

Ingredients

Makes 4 bottles

1 large onion, peeled and roughly chopped

a dash of olive oil

1 thumb-sized piece fresh ginger, roughly chopped

2 cloves garlic, minced

½ fresh red chilli, de-seeded and finely chopped

1 large bunch organic basil, chopped, including stalks

1 tbsp coriander seeds

2 cloves

1 star anise

1 tsp fennel seeds

1 tsp freshly ground black pepper

1 tsp sea salt

1 kg home-grown or organic tomatoes, chopped

200 ml red wine vinegar

70 g brown sugar

_____________________________________________________________

Sweat the onion in a little oil in a large heavy-bottomed saucepan for 2-3 minutes. Next add the ginger, garlic, star anise, fennel seeds, chilli, basil stalks, coriander seeds and cloves.

Gently cook on low heat for 10 to 15 minutes until softened, stirring every so often.

Now add the tomatoes and cold water.

Bring to the boil and simmer gently until the sauce reduces by half. This will take 30-35 min. Stir once in a while to ensure the sauce does not stick.

Add the basil leaves, then blitz the sauce using a hand blender, then push it through a sieve, to make a smooth ketchup.

Pour back into the pan.

Now add the vinegar and the sugar, stirring until the sugar is completely dissolved.

Turn up the heat to medium and simmer until it thickens. Now season with salt and pepper.

Pour the ketchup through a funnel into sterilized bottles, seal and place in a cool dark place until needed.

Date and Seed Power Balls!

power balls-1 copy


On a resent trek in the north of Scotland, which I did with my family and a few friends (plus a happy dog) I knew a homemade energy boosting snack would be very much appreciated. Everyone in the group requested the recipe, so I took that as a good sign. These Energy ‘Power Balls!’ are rather delicious, and quite filling to, perfect for an in between meal snack, or a power boost when carrying heavy rucksacks and navigating unknown terrain in the wilderness!

power balls-3 copy

They store really well in an air tight container and keep for weeks in the fridge. You can also freeze them, and defrost as needed.

I’m posting two recipes; one with peanut butter, and the other with a luxurious Danish Nougat. Its not easy to get your hands on in the UK, but it is delicious.. Its a household staple in Denmark, used mainly around Christmas, paired with marzipan…yum!  So I would say, use Nutella or something similar, if you don’t live in DK.


______________________________________________

Power Balls no. 1

Makes 25


100g sesame seeds

100g sunflower seeds

100g dates

5 tbsp organic peanut butter ( or more if the mixture is too dry)

4 tbsp milled flax seeds

3 tbsp agave syrup

100g almonds

100g oats

1 tbsp organic coco powder

desicated coconut for rolling


______________________________________________

On a hot dry pan, gently toast the almonds, oats and sunflower seeds for a few min. Take care not to burn them.

Next, place all the dry ingredients including the dates in a food processor and blitz for a few moments. You want the consistency to be medium, between smooth and raw.

Empty the contents into a bowl, and add the peanut butter and agave syrup. Using a spoon, or your hands, make 25 balls, and roll them in the coconut. Store in the fridge.


______________________________________________


Power Balls no. 2


Makes 25


75g sesame seeds

75g sunflower seeds

150g dates

100g blød nougat – or nutella

4 tbsp milled flax seeds

1 tbsp hemp seed oil

100g cashew nuts

75g oats

2 tbsp organic coco powder


___________________________________________

On a hot dry pan, toast the cashews, oats and sunflower seeds for a few min. Taking care not to burn them.

Next, place all the dry ingredients including the dates into a food processor and blitz for a few moments. You want the consistency to be medium, between smooth and raw.

Empty the contents into a bowl, add the nougat and oil and mix it in well.

Finally, using a spoon, or your hands, make 25 balls. Store in the fridge.


Yellow Squash and Lemon Pasta with Creamy Rocket Pesto

yellow squash pasta-1

If I’m not entirely mistaken, putting raisins in pasta (or Pizza) dishes is a Sicilian thing. And I’m glad I discovered it. Its not that I’ve got a sweet tooth, I just love food that has a sweet/savory combo going on. And this dish definitely does. I pulled this dish together the other day, as my yellow ‘crook neck’ squash’s are producing lots of small tasty fruits, and they taste best lightly cooked, and al dente. I also have a fantastic amount of peppery rocket needing eaten. And so often when I’m gardening, recipes make themselves out of what fruit and veg is ripe just that very day.


rufus squash

This pasta dish is fresh and light, perfect for the middle of summer, but filling and satisfying all at the same time. This is definitely a dish to enjoy outdoors on the terrace on a hot day – dreaming yourself away to Sicily….

yellow squash pasta-2

________________________________________________

Serves 4

500g farfalle pasta
1 medium yellow squash
1 small courgette
1 garlic clove
a handful golden sultanas
a small handful pine-nuts
olive oil for frying

For the pesto:

150g cream cheese or alternative vegan spread
2 tbsp organic olive oil
a small handful pine-nuts (3 tbsp)
1 garlic clove
2 large handful rocket, plus extra for garnish
salt and freshly ground black pepper 1/2 lemon, juiced

______________________________________________

Bring a large pan of water to the boil, and pop the pasta in, cook for roughly 8-10 minutes until al dente.

Meanwhile, make the pesto.

Add all the pesto ingredients to a food possessor and blitz until smooth and creamy.

Next, chop the squash and courgette into rounds. Peel the garlic, and finely chop.

Heat a large frying pan on medium heat, and add a little olive oil, fry the squash and courgette gently for 4-5 min, then add the garlic and fry for a further 1 min, add the pine nuts and raisins and heat trough.

Now add the pesto mixture until heated though, roughly 1-2 minutes. Add the lemon zest to the dish.

Finally add the drained pasta to the pan, and mix until all the pasta is coated in sauce. Serve with extra rocket leaves and black pepper.